4 DIY STEPS TO REPAIR THE RUST ON YOUR CAR
Metal when reacts with moisture ruins the metal and forms rust that can totally ruin your car!
At the beginning you see a brown stain, also you can find a bubble in the paint at the bottom when you first notice.
An individual who’s aware of the future repercussions of rusting is smart enough to show it to an automotive repair shop, but it would be better if you try to fix your car first.
The thing about rust is you can fix it on your own.
4 DIY STEPS TO REPAIR RUST ON YOUR CAR
1. Paint and Supplies
Sandpaper
Masking tape
Primer
Poly-sheet
Tack rag
Polishing compound
Touch-up paint
Clear coat
Sanding block
Grease and wax remover
Painter’s tape
Microfiber cloth
#Protip- Choose a whole day to fix some rust spots on the body panel of the car.
Buying the Paint
You will have to find the paint code of the manufacturer which is already mentioned on a number of places on the body of the car.
Check the engine compartment or below the trunk or places with higher probability to find printed codes that resemble factory settings for your specific car.

2. Cover the Vehicle
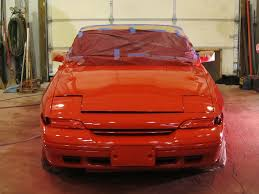
You need to always cover the vehicle by taping the edges by poly sheeting some inches away from the area that needs repair.
The point is to safeguard your entire vehicle from paint overspray.
Like, when painting the hood, spread poly sheets on the engine and the fenders.
For doors, put poly sheeting to fit the door opening and paste it to the jamb.
3. Sanding and Feathering
This is the most crucial step as it would require patience.
Steps to Get Sanding and Feathering Right
The rust spots should be scrapped by sandpaper down to the metal.
Also, enlarge the sanded area so that you get enough space to feather the edges.
Initially, start off with 40-grit sandpaper then move to 120-grit sandpaper to feather the edges, and lastly use 220 grit sandpaper.
Scapers should be used to remove blisters from the paint.
Use a tack rag to get rid of the particle from the unmasked area.
Clean the sanded area with a cloth.
The paint prep solution should be applied as advised by the manufacturer.
4. Clear Coat
The last part is applying a layer of clear coat to add that shine to your vehicle.
But, it isn’t that easy. It can ruin all the hard work you’ve done if you applied in a wrong manner.
If you go wrong in the application of clear coat you will have to wait for 48 hours before trying to fix it with sandpaper and polishing compound.
Once, you complete all the steps, all your are left with is waxing.
A&G Customs for Rust Repair
If you are looking for the best automotive repair in Doylestown, contact A&G Customs today.
They offer an extensive variety of automotive services including interior work, brake repair, inspections, auto bodywork, towing, inspections, restorations, custom paint, and general maintenance.
A&G Customs is your local one-stop auto repair shop in Doylestown.
You can reach them at 215 669 3072.
Article Source: 4 DIY STEPS TO REPAIR THE RUST ON YOUR CAR
